Category: Sandwiches, Burgers & Wraps
-

Sweet Potato Jalapeno Popper Tacos
This recipe came to be from a blissful kitchen mix-up when Jamie accidentally bought ingredients for two separate recipes she planned to cook. The original recipe we wanted to make was for sweet potato and pineapple tacos. We knew all of that starchy sweetness needed salt and spice and the first thing that came to…
-

Spinach & Feta Turkey Burgers
This is the recipe that changed the turkey burger game for us. Let’s face it, turkey burgers are notoriously dry. The meat is so lean that it often doesn’t lend well to grilling unless you incorporate additional fat like in our spicy turkey burger recipe. Instead of adding chicken sausage, we have incorporated feta and…
-
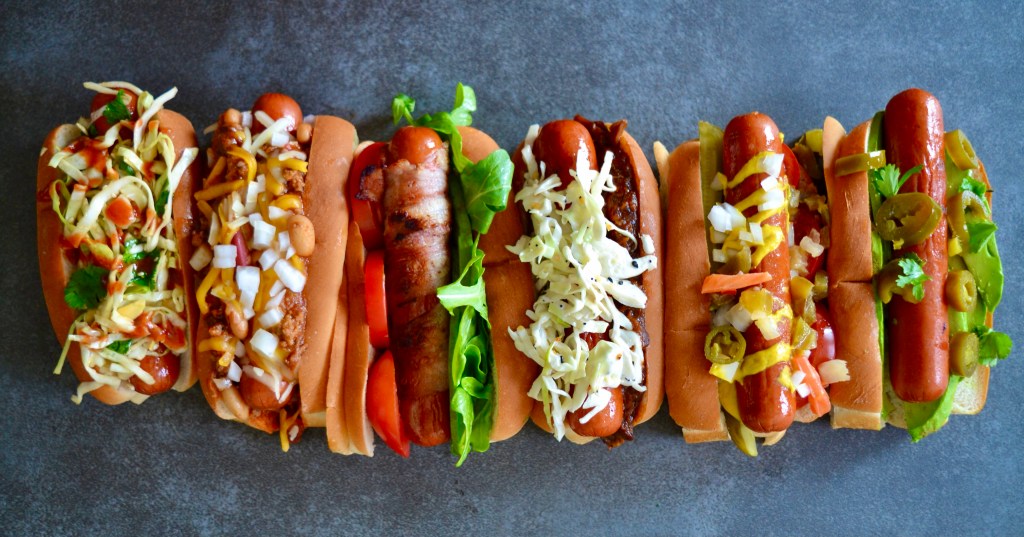
Semi-Homemade Hot Dog Bar
Entertaining does not have to be fancy to be delicious and delightful to your guests. We love having friends over in the summer for a backyard barbecue, and instead of spending hours prepping for a fancy feast, we like to have a really fun menu like this Semi-Homemade Hot Dog Bar. We love that we…
-
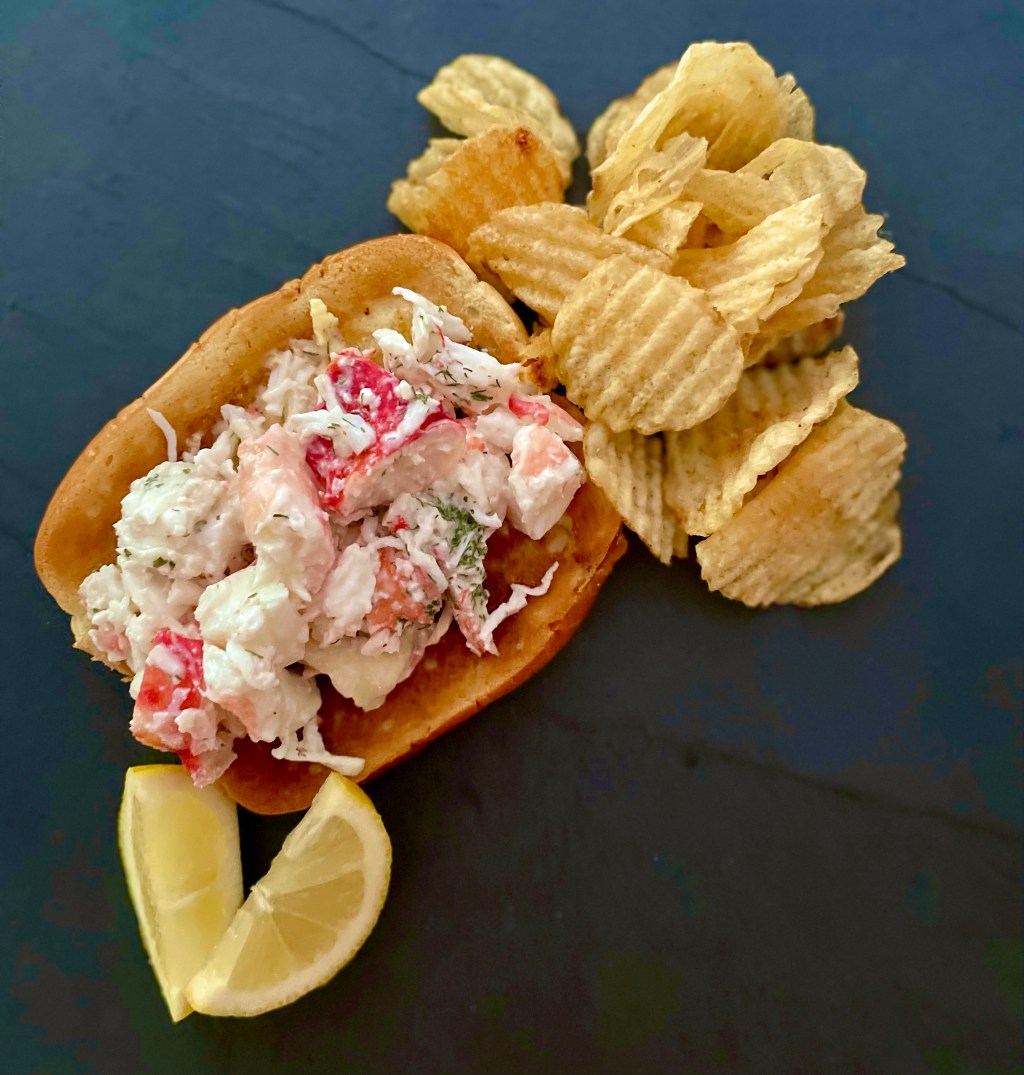
Alaskan King Crab Rolls
Every year for Calli’s birthday, we have a seafood birthday celebration with our best family friend, Leslie. We order a box of Alaskan king crab legs from Costco, steam the legs and serve them with lemon and hot butter. It is one of our favorite summer traditions and something we look forward to every year.…
-
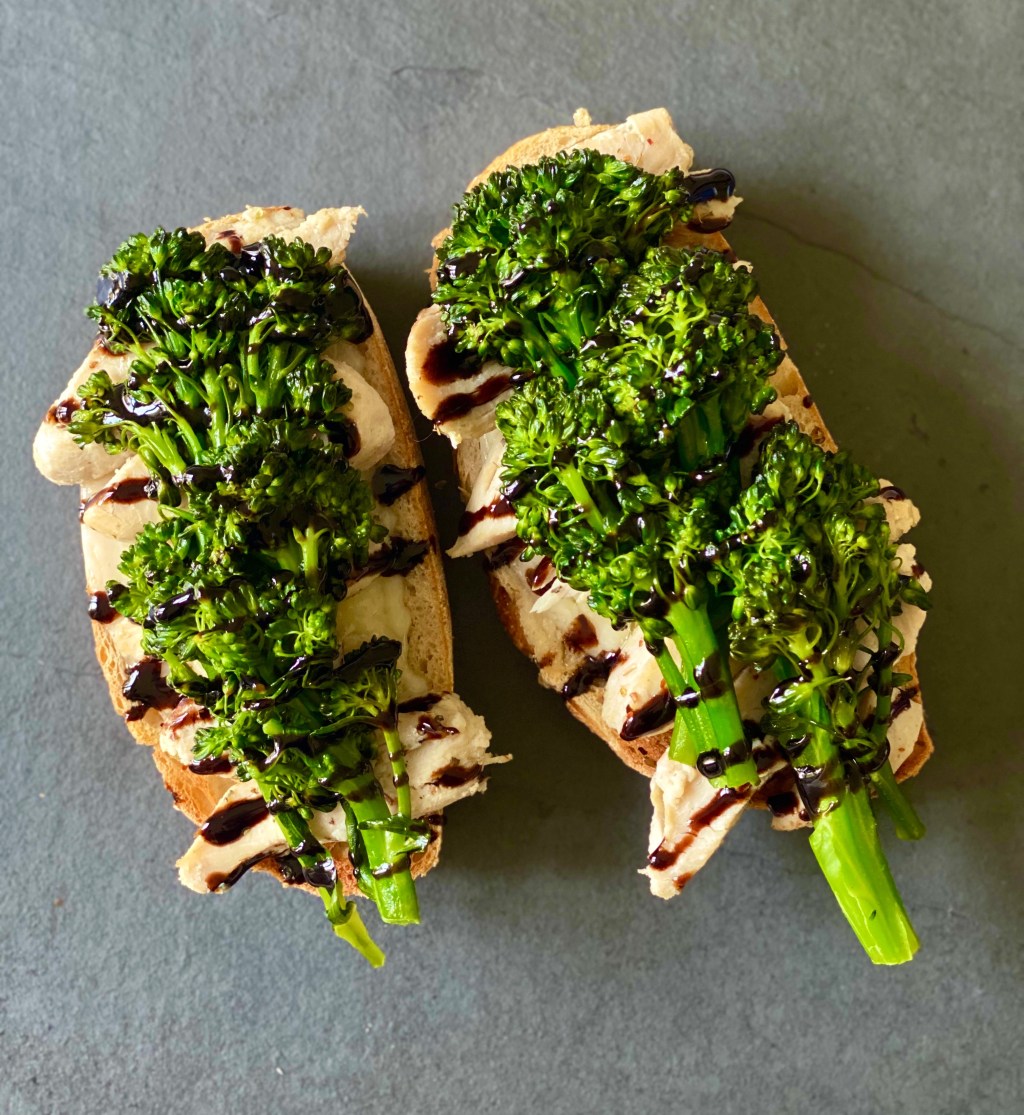
Broccoli & Chicken Open Faced Sandwiches
Kidd grew up eating open faced subs that his dad would cook and has fond memories particularly of a chicken and broccoli sandwich. We spent time in the kitchen trying to recreate the nostalgia, and have landed on this open faced broccoli and chicken sandwich with Swiss cheese and balsamic glaze. The sandwich is packed…
-

Bouchon Bakery Inspired Brie.L.T. Sandwiches
This recipe inspiration comes from our trip to Napa last October. Bouchon Bakery, from famous chef Thomas Keller, was at the top of our list of places to visit when we were in Yountville. We made an adventure of our day by riding bikes from Napa to Yountville and were pleasantly starving and ready for…
-

Buffalo Chicken Sandwiches
The great sandwich debate is open in our homes recently. Some of us love sandwiches and others, not so much. The one thing we can agree upon is that everyone in our homes loves some sort of buffalo chicken. We set to find a happy medium with this buffalo fried chicken sandwich. We have infused…
-

Italian Beef Sandwiches
Our dad was born and raised in Chicago, and one of our favorite traditions when we visit our family is to go to Portillo’s for their famous Italian beef sandwiches. We have great memories of doing this often with our grandpa and grandma – scrambling for a table, getting everyone’s order, our grandpa saying he…
-

Thanksgiving Leftover Turkey Sandwiches
We love Thanksgiving leftovers as much as the next person, but we find that half the fun of eating all the leftovers is creating new recipes to “reinvent” what we have in the refrigerator. Last year, we cured our Thanksgiving hangovers with an epic leftover breakfast. Knowing that this year is going to be more…
-
Tuna & Avocado Melt
Tuna salad is one of those things that can be easily made but if you spend just a little extra time to make it well, it is SO darn delicious. In an effort to cut down on some calories this summer, we have been making tuna salad with avocado, lots of lemon, and just a…
