Category: Pastas & Noodles
-

Pumpkin Mac & Cheese
One of our favorite childhood memories of Halloween is having a special dinner of mac and cheese and “octopus” hot dogs. We would slam down that dinner and run out the door to start trick or treating. In honor of that tradition, we created this recipe for pumpkin mac and cheese. It is an adult…
-
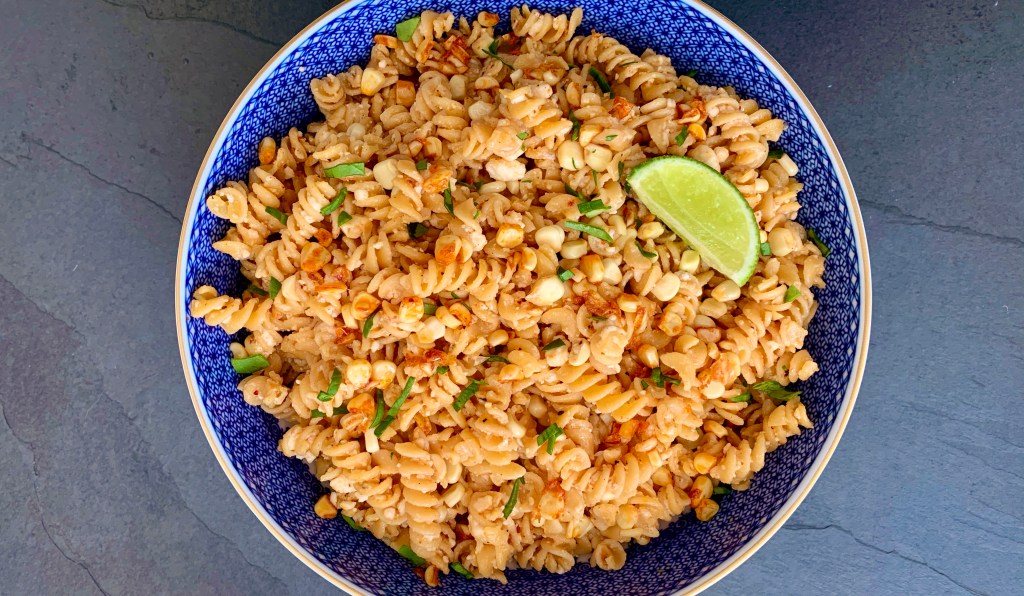
Elote Pasta Salad
Elote (Mexican street corn) is one of our absolute favorite side dishes to have during the summer. We have yet to find anyone that doesn’t like it and will find an excuse to squeeze it into any dinner menu that we plan. To change things up for our Memorial Day menu, we wanted to take…
-

Red Curry Noodles with Crispy Tofu
If you’ve been following us for a while, you know we adore a good noodle recipe that incorporates lots of spicy Asian flavors. We love eating traditional Thai curry, but now that the weather is getting warmer, the idea of a big bowl of soupy curry isn’t quite as welcome as it is in the…
-

Creamy Pesto Pasta
Try as we might, we have yet to find a store-bought pesto that tastes as good as a homemade batch. We love making homemade sauces and pesto is one that we make regularly in the summer. We love to drizzle it over sliced tomatoes and mozzarella for a caprese salad, throw it on a grilled…
-

Semi-Homemade Mushroom & Pancetta Ravioli
One of our favorite food markets in Columbus, Ohio is the North Market which features a number of restaurants stalls and food providers. In the past, we have only been in Ohio for a short stay so we were only able to try the restaurants, but now that we are living here for baseball season,…
-

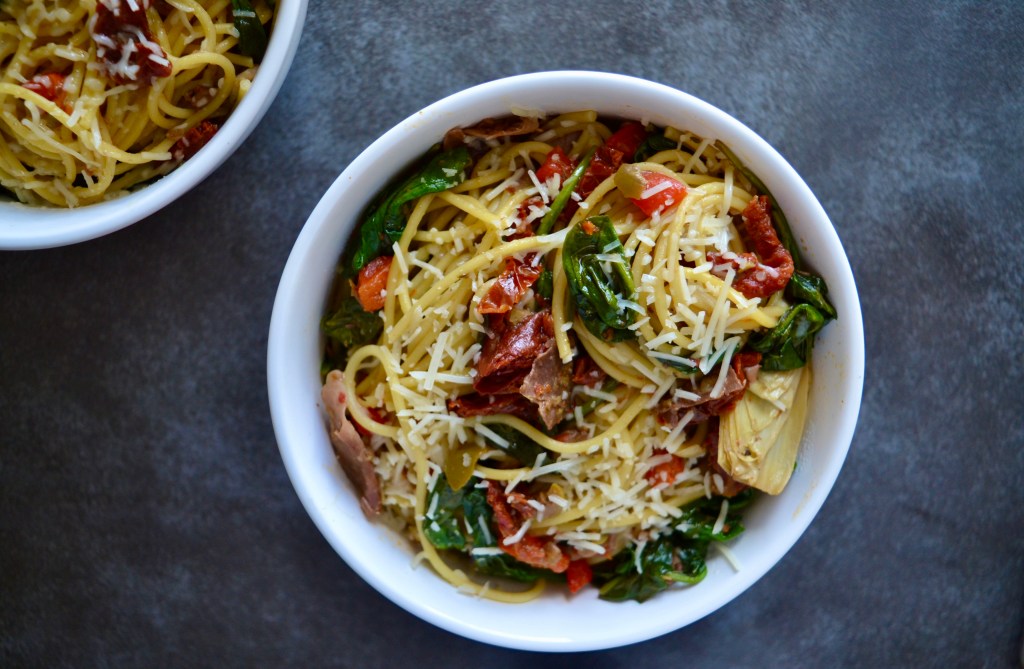
Antipasto Pasta Salad
We recently visited family in New York and were over served with delicious Italian food all week long. Our favorite kind of vacation. Kidd’s side of the family is well known for cooking up many specialty Italian dishes and we spent the week being spoiled with meal after meal of our favorite dishes. With grilling…
-
Antipasto Pasta
Like some of our best recipes, this pasta first came about by accident. The week before Ryan’s triathlon, we were doing lots of carbo-loading and also trying to clean out the fridge before leaving town for the big race. As you know by now, we love a good cheese board, and for the sake of…
-

Crispy Sesame Chicken Noodle Bowls
We love Asian food of all kinds (seriously, we are pretty obsessed) and for those lunches and dinners where we want to cook in, we jump at the opportunity to cook with some of the Asian flavors we like most. These crispy sesame chicken bowls are the perfect recipe for an easy and flavorful family…
-

Creamy Lemon Lobster Fettuccini
You may remember a few weeks ago that we put our chef skills to the test and made homemade fettuccini. We have to admit that even after Jamie’s famous pasta fail in culinary school, the homemade pasta process is a lot of fun and really not too difficult if you give it your full attention.…
-

Homemade Fettuccini
As you may recall from the holiday season, one of our gifts to ourselves this year was a subscription to Master Class. For the month of January, Jamie has been working through Gordon Ramsay’s class, which includes a section about making pasta from scratch. Ironically, Jamie failed her first pasta making class in culinary school,…
