
As you may recall from the holiday season, one of our gifts to ourselves this year was a subscription to Master Class. For the month of January, Jamie has been working through Gordon Ramsay’s class, which includes a section about making pasta from scratch. Ironically, Jamie failed her first pasta making class in culinary school, so this recipe is a little bit of a redemption song from that fateful day in Philadelphia.
While making pasta from scratch might seem intimidating, it’s actually quite easy and a lot of fun. It’s a great activity for an at home date night or a fun way to include your kids in the kitchen. We are giving you step by step instructions (with photos) so that you can easily follow along if this is your first time making any sort of pasta from scratch. We have purchased this pasta roller and cutter from Amazon- there are a million to choose from but this one is pretty inexpensive and gets the job done just fine. Stay tuned for an exciting recipe coming Valentine’s Day week, where we use this fettuccini to make lobster pasta!
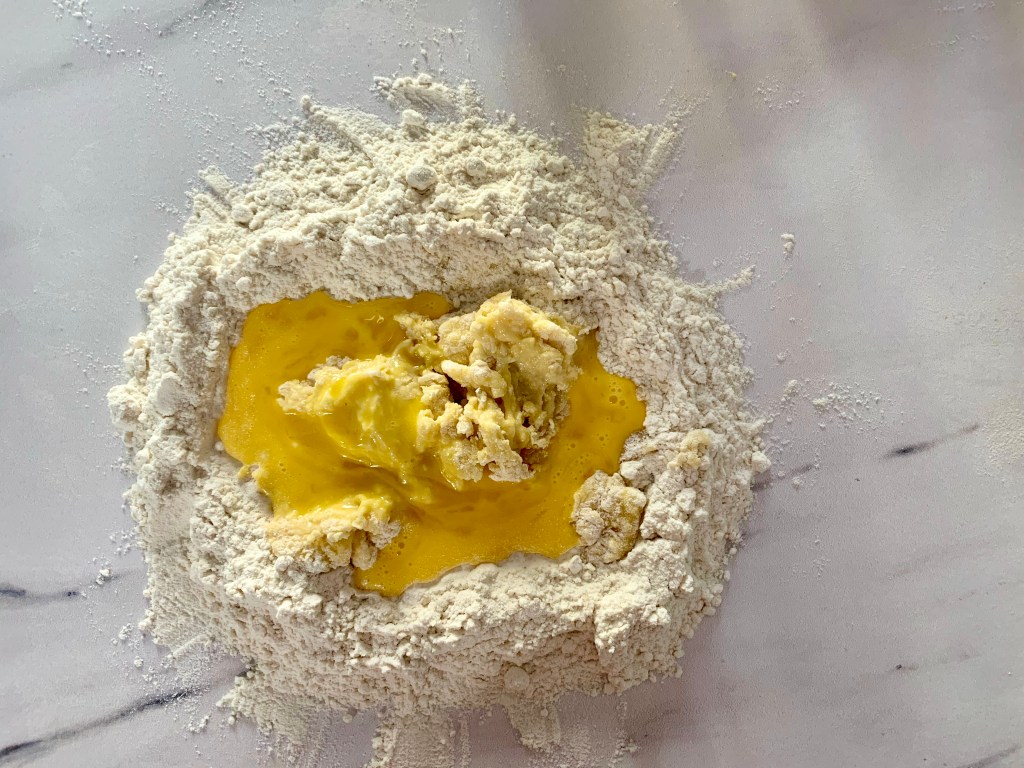
Step 1: Measure the flour and make it into a well on a cold surface. We have used 00 flour for this recipe (you can find it at Whole Foods and most grocery stores).

Step 2: Whisk the eggs in a bowl and add 1/3 of the egg mixture + the olive oil to the center of the flour well.

Step 3: Use a fork to start dragging the flour in towards the center and mixing it with the eggs. Be careful not to break through the flour wall to help avoid having the eggs spill out of the center… you’ll make a big mess if you do!

Step 4: Continue this process until the egg is mostly absorbed by flour.

Step 5: Add another 1/3 of the egg mixture. Repeat the process of adding flour with your fork until the egg is mostly absorbed with flour. As you get towards the end of the flour, the dough should start to form into a wet ball.
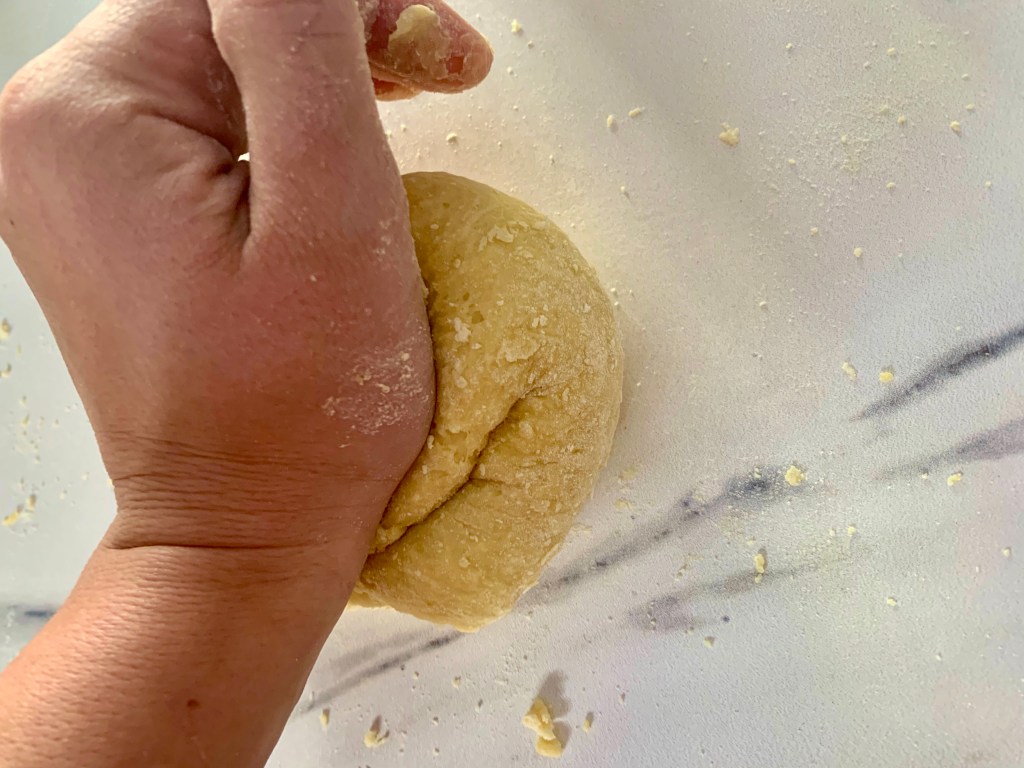
Step 6: Ditch the fork and cover your hands in a light layer of flour. Start to use your hands to form the dough into a ball. At this point you will have to gauge if you need any more of the egg mixture or if the dough is at a good consistency. In the many batches of pasta we made for this recipe, we never used all of eggs. The dough should be dry enough to start forming a ball but not so dry that it has no traction on your surface when you knead it. When it doubt, resist adding anything to the dough at first.

Step 7: Start to knead the dough by folding over the top corner of the dough into the center of the ball.

Step 8: Use the heel of your palm to push the dough from the fold back towards the top. Turn the dough 1/4 of a turn and repeat this process for 5 minutes or so. This is where the gluten in the flour develops so that the pasta holds its shape during cooking. It is around this point that you might decide you need to add a little flour if the dough is constantly sticking to the counter surface or a little egg if the dough is dry and very crumbly.
Step 9: The dough will start to become more smooth and form into a ball with little cracks. Continuing kneading for a few more minutes.
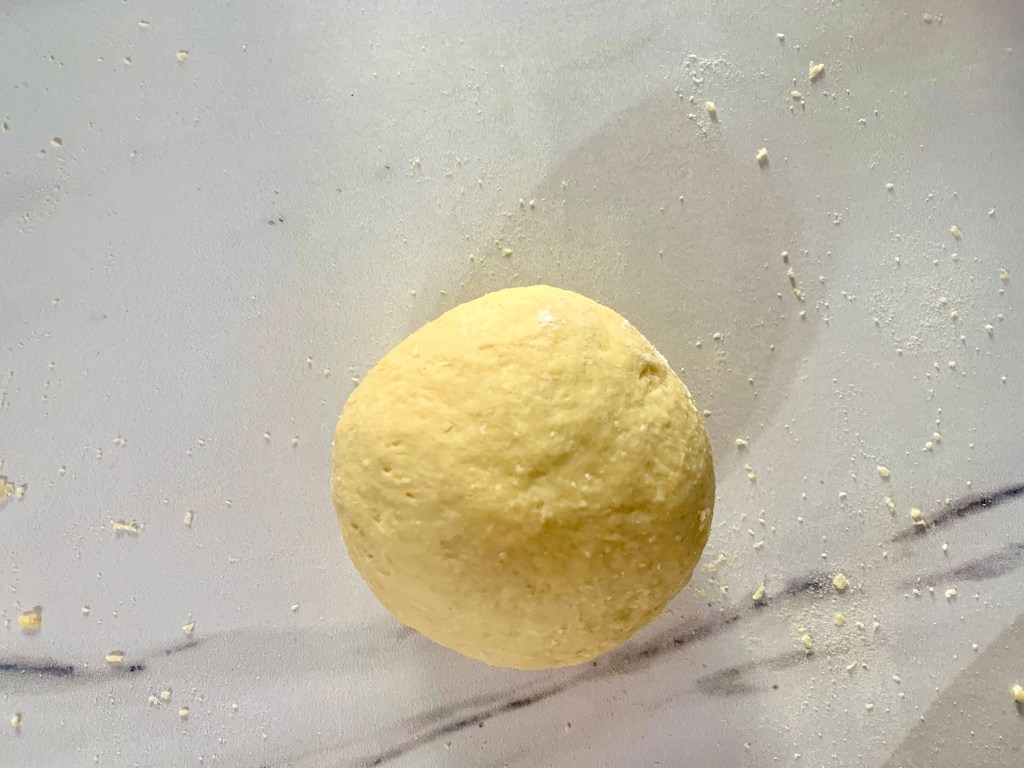
Step 10: You will know when you are done kneading when the dough appears shiny and very smooth. At this point, you can tightly saran wrap the dough and refrigerate it for 20 minutes to rest.

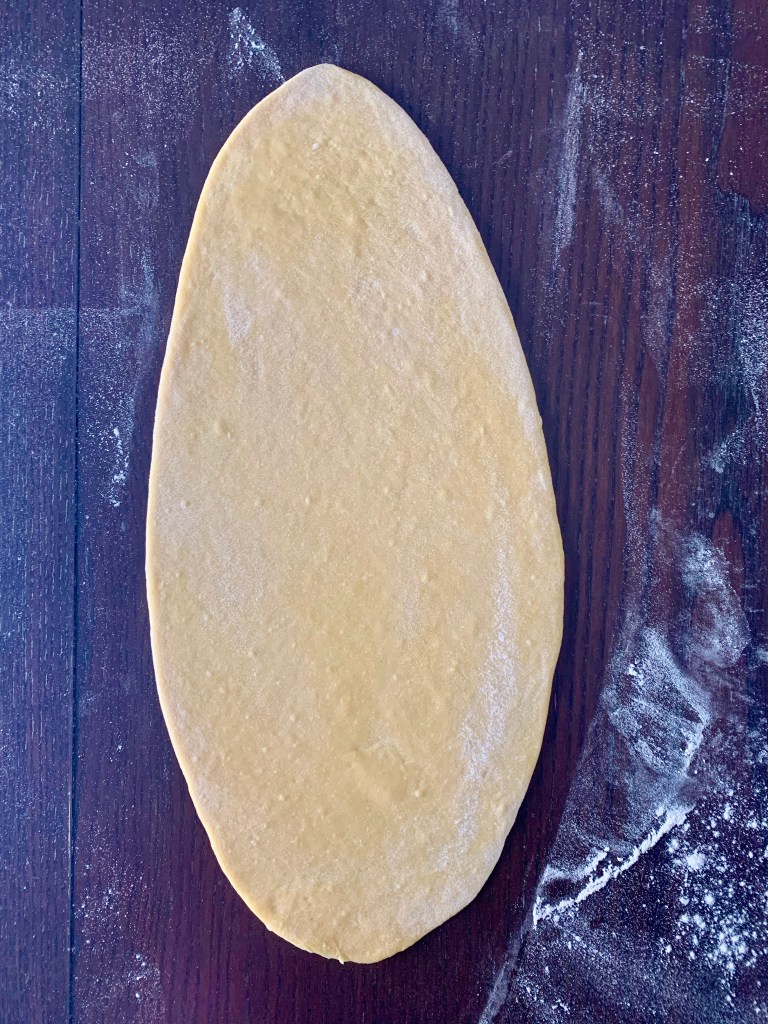
Step 11: After refrigerating, lightly flour the surface that you want to roll the dough. Put a dusting of flour on a rolling pin and begin to roll the dough out into a long rectangle, keeping in mind that the pasta will have to fit through the width of the roller.

Step 12: Keep rolling until the dough is as thin as you can make it with a rolling pin. Don’t go crazy to make this super thin- that is what the pasta roller is for!
Step 13: It is time to use the pasta roller! This is our favorite part. Put a light dusting of flour all over the pasta roller. Begin to gently feed the dough into the pasta roller on its thickest setting (1). Be sure to pull the pasta out of the roller as it goes through the machine so that it doesn’t stick. Roll the pasta through the thickest setting three times before moving down to the next setting. If at any point the dough appears to be sticking to the roller or to itself as it comes out, give it a little dusting with flour and continue.

Step 14: For this recipe, we are making fettuccini, which is a rather thick pasta. While the rolling is fun, unfortunately we are only doing to roll down to a 2 or 3 setting on the pasta roller. Make sure you roll the pasta through the machine twice on each thickness setting, for a total of seven times through the machine (three times on the 1 setting, two times on the 2 setting, and two times on the 3 setting). At this point, it is ready to go into the cutting side of the machine.

Step 15: Cut the pasta dough into the length that you want your pasta for cooking – we suggest anything from about 6 – 10 inches long. You will have about 3 segments of dough based on the quantity of this recipe. Make sure that the cutting side of your pasta roller is well floured and feed each of the segments through the pasta cutter.

Step 16: Gently separate any pieces of pasta that have stuck together, using an extra light coating of flour if necessary so that the noodles don’t cook in one clump. If you don’t plan to use the pasta right away, store it in the refrigerator in an air tight container.

Step 17: Cook the pasta and serve with any sort of sauce variation that sounds good to you! Remember that fresh pasta cooks much faster than dried pasta; it may be in the boiling water for only 2-3 minutes before it is al dente. Our recipe for Creamy Lemon Lobster Pasta is coming Valentine’s Day week… stay tuned!

Homemade Fettuccini
We are taking things up a notch in the kitchen and making pasta from scratch!
Ingredients
- 1 cup 00 flour + more for rolling the pasta dough
- 2 eggs, room temperature
- 1 egg yolk, room temperature
- 1 tsp olive oil
Directions
- Pour the flour onto a flat surface and make a well with the flour so that when you pour the eggs in, none of the liquid will escape.
- Put the eggs and egg yolk into a bowl and whisk well to combine.
- Add the olive oil and about 1/3 of the egg mixture to the center of the well. Use a fork to gently pull flour in from the edges to the center of the egg mixture. Gently mix the flour into the eggs, pulling more flour in as needed. When the dough is starting to get too dry from flour, add another 1/3 of the egg mixture. Continue to the process until all of the flour and egg are absorbed. Pay attention at this point before adding the remainder of the egg- err on the side of not adding the eggs and seeing how the dough forms before you make the dough too wet. After making a few batches of pasta, we never added all of the egg to the flour.
- Lightly coat your hands with some extra 00 flour. Use your hands to begin to form the dough into a ball. The dough will be on the wet side, which is why it is important to have your hands coated in flour. Start to knead the dough into a ball, adding flour as necessary so that it starts to take shape. Knead the dough by taking the top corner of the dough, folding it down, and using your palm to knead it. Repeat the process many times, for about 5 minutes. The kneading helps the gluten in the flour develop and will help the pasta keep its shape while cooking. You will know you are done kneading when the dough has an almost glossy appearance and the forms into a smooth ball without any rips. Wrap the pasta dough tightly in saran wrap and place in the refrigerator for at least 20 minutes, up to overnight.
- Assemble your pasta roller and toss a light coating of 00 flour all over the pasta roller and your counter work space. Remove the dough from the saran wrap and place on a lightly floured surface. Roll the dough lengthwise as thin as you can get it with a rolling pin, making sure to pick up the dough every once in a while to make sure that it isn’t sticking to the counter. Flour as necessary to make sure this doesn’t happen. You want the dough to be in a long rectangle, keeping in mind that it has to fit through your pasta roller.
- When the dough is as thin as you can make it with the rolling pin, begin the process of putting it through the pasta roller. Set the pasta roller onto “1” thickness, or the thickest width option. Roll the pasta through the machine, being careful to gently drag it out from the bottom as you continue to roll. Roll the pasta through the thickest “1” setting 3 total times before moving it down to the next setting.
- For this pasta recipe, we are making a fettuccini. That means that we will only go down to a 2 or a 3 setting, as fettuccini is much thicker than other pastas. Roll the pasta through the “2” setting two times before moving down to the “3” setting. If you like the thickness of the pasta dough at the “2”, you can stop there and continue to the next step.
- When you are ready to use the cutting portion of the pasta roller, lay the pasta dough onto your workspace and use a pairing knife to cut the dough width wise into about 8″ long sections. The pasta cutter that we have linked above has a spaghetti width and a fettuccini width. Make sure you use the fettuccini cutter – it will be the thicker shape – to cut each of the segments of pasta. Make sure you flour the pasta before putting it through the cutter so that the strands of pasta separate from one another. After you have cut the pasta, keep it in an air tight container until you are ready to cook it.
- To cook the pasta, bring a pot of water to a rapid boil. Add the pasta and cook 1-3 minutes, or until it is the texture you desire. Serve with whatever sauce pairings you can dream up!

Leave a comment