Tag: Side Dishes
-

Prosciutto Wrapped Veggie Bundles
When Jamie first made this dish and sent it to Calli for her thoughts, Calli’s first response was that they “look beautifully bougie”. She is not wrong. Even our chosen title for this recipe is so extra, but we just love this recipe too much not to post it. There are a bazillion versions of…
-
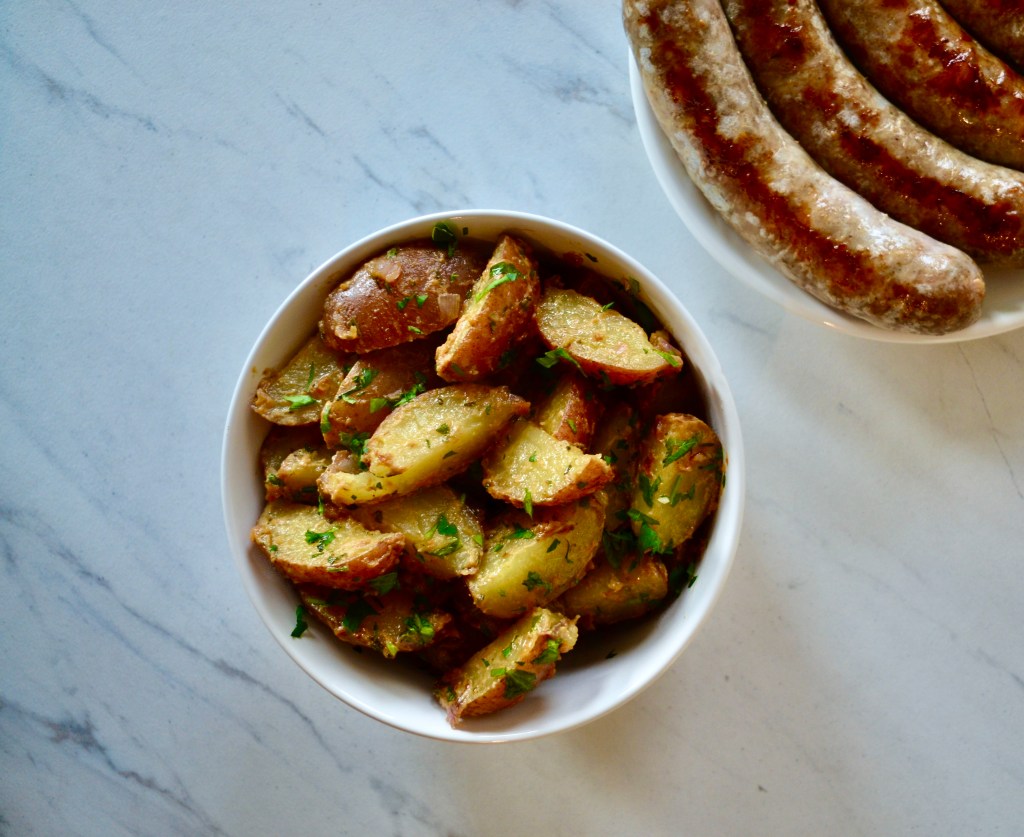
German-Style Potato Salad
Whenever we think of potato salad we think of potatoes swimming in a bath of mayonnaise, and frankly it doesn’t get us very excited. We like to eat potato salad that leaves us truly pleased with the flavors and textures of the dish. Insert this German-style potato salad – a vibrant potato salad with a…
-

Antipasto Pasta Salad
We recently visited family in New York and were over served with delicious Italian food all week long. Our favorite kind of vacation. Kidd’s side of the family is well known for cooking up many specialty Italian dishes and we spent the week being spoiled with meal after meal of our favorite dishes. With grilling…
-

Pumpkin Cornbread Muffins with Cinnamon Honey Butter
You might question “needing” a bread item as you plan your Thanksgiving menu this year, particularly with all of the other side dishes that will likely grace your table. At Tuck & Tate, we think the more the merrier! We will gladly cook extra if it means there will be leftovers later on. Over the…
-

Mac & Brie
We only started having mac and cheese on Thanksgiving a few years ago, when our dad was inspired by a Cajun macaroni recipe he saw online and insisted on bringing it for dinner. After its introduction on our Thanksgiving plates, we couldn’t imagine another Thanksgiving without one of our all time favorite side dishes. We…
-

Smashed Potatoes with Goat Cheese & Pesto
Our good friend Lea has been snapping pics of her homemade potatoes and we immediately reached out for the recipe. Normally recipes from her are hard to come by because of lot of her cooking has been taught in person, without recipe, from her amazing, Italian mama. Luckily for us, this time, she was willing…
-

Mixed Potato Latkes with Green Goddess Sour Cream
If you celebrate Hanukkah you know that there is no holiday dinner without latkes, or potato pancakes. Fried potatoes, sour cream, maybe some apple sauce…. is there anything better? Well, maybe. Every year we take a new spin on the classic recipe to mix things up for our holiday celebrations. Last year we even had…
-
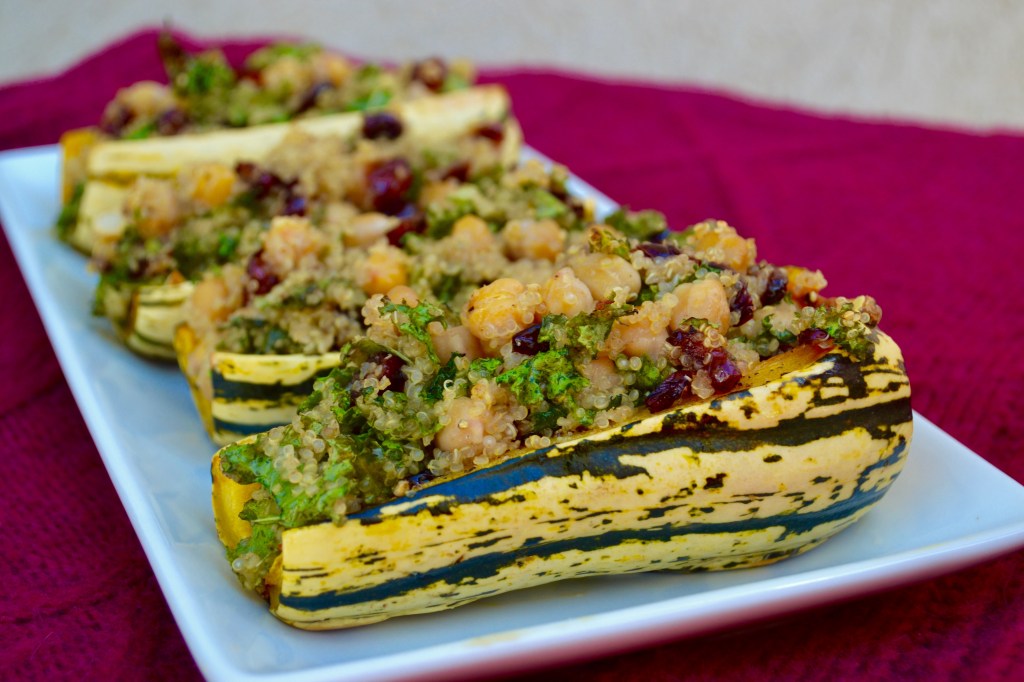
Cranberry & Chickpea Stuffed Delicata Squash
Not sure about you, but we can’t be the only people on Thanksgiving that wish there was just one healthy or crunchy item on the table. Don’t get us wrong, we are HERE for the mashed potatoes and stuffing, but just one little thing to help balance out the decadence goes a long way. We…
-

Cast Iron Green Bean & Mushroom Casserole
This dish has a bit of a history with Tuck’s mom and dad. Tuck’s mom had just finished culinary school and was admittedly a bit of a food snob at the time. It was going to be her first Thanksgiving with Tuck’s dad (this was before Tuck and before marriage) and he insisted on having…
-
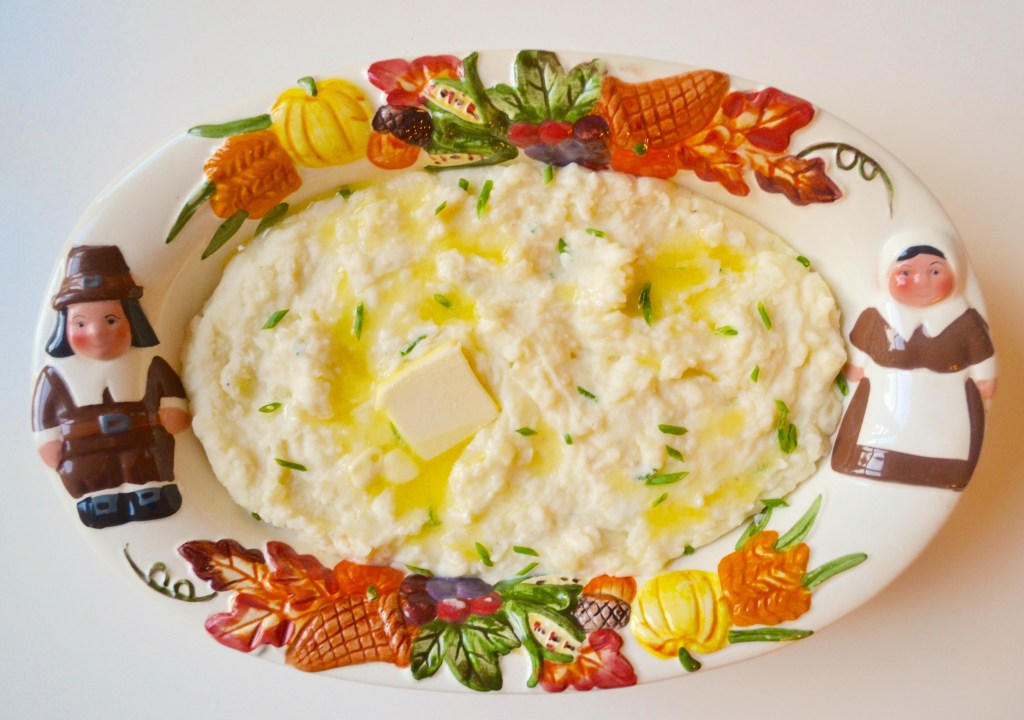
Best Ever Mashed Potatoes
Nana has a few rules when it comes to Thanksgiving and one is that mashed potatoes should never be healthy. While we do love a good cauliflower mash and finding ways to make our favorite foods healthier, Thanksgiving is not the time that we mess with a classic. The recipe below calls for butter, milk…
