Author: Tuck & Tate
-

Arugula & Burrata Flatbread
This flatbread is one of our go-to recipes for summer entertaining or a quick weeknight dinner. With just a few simple ingredients, this recipe bursts with flavor from the creamy burrata, citrusy lemon oil, and fresh basil. We top it with lots of peppery arugula (more than pictured) so that we have a salad and…
-

Instant Pot Hatch Chili Shredded Chicken
We love a quick and easy taco night as a tasty way to get dinner on the table. Hatch chiles are in season in Colorado and we try our best to use them as much as we can this time of year and really soak up the smoky, spicy flavor they bring to a dish.…
-

Semi-Homemade Hot Dog Bar
Entertaining does not have to be fancy to be delicious and delightful to your guests. We love having friends over in the summer for a backyard barbecue, and instead of spending hours prepping for a fancy feast, we like to have a really fun menu like this Semi-Homemade Hot Dog Bar. We love that we…
-

Grilled Supreme Pizza
Grilled pizza is a staple for us and is constantly popping up on our weekly meal rotation. We love how easy and versatile the base recipe is so that we can mix and match ingredients with the season and our preferences. For this week’s recipe we were craving a classic supreme pizza. We love the…
-
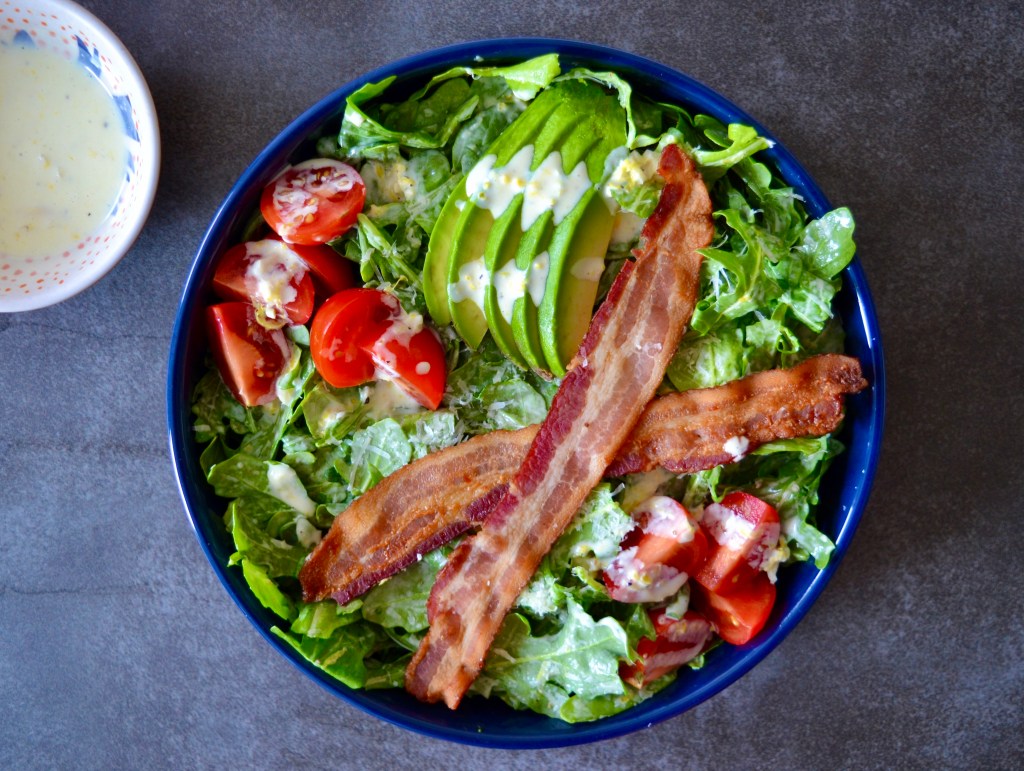
BLAT Caesar
We are all about entrée salads during the summer, but if we are choosing to eat salad for a meal it needs to be hearty enough to feel like a complete meal. We love this rendition of a Caesar salad, which is loaded with all of our favorite BLAT ingredients to make things exciting. We…
-

Olympics Appetizer Board
We LOVE watching the Olympics and can’t wait for the opening ceremonies to kick off the long anticipated summer games. This year is particularly special for us because our Chief Tasting Officer, husband, brother-in-law and uncle extraordinaire Ryan is competing in baseball for team Israel. We were crushed that due to COVID fans couldn’t attend…
-

Grilled Lemon Chicken Kabobs
You probably know by now that we love cooking on the grill during the summer. We love versatile entrees that we can mix and match with other menu items, and these lemon chicken kabobs are a great addition to any cooking routine. We go back to this recipe over and over because it ticks all…
-
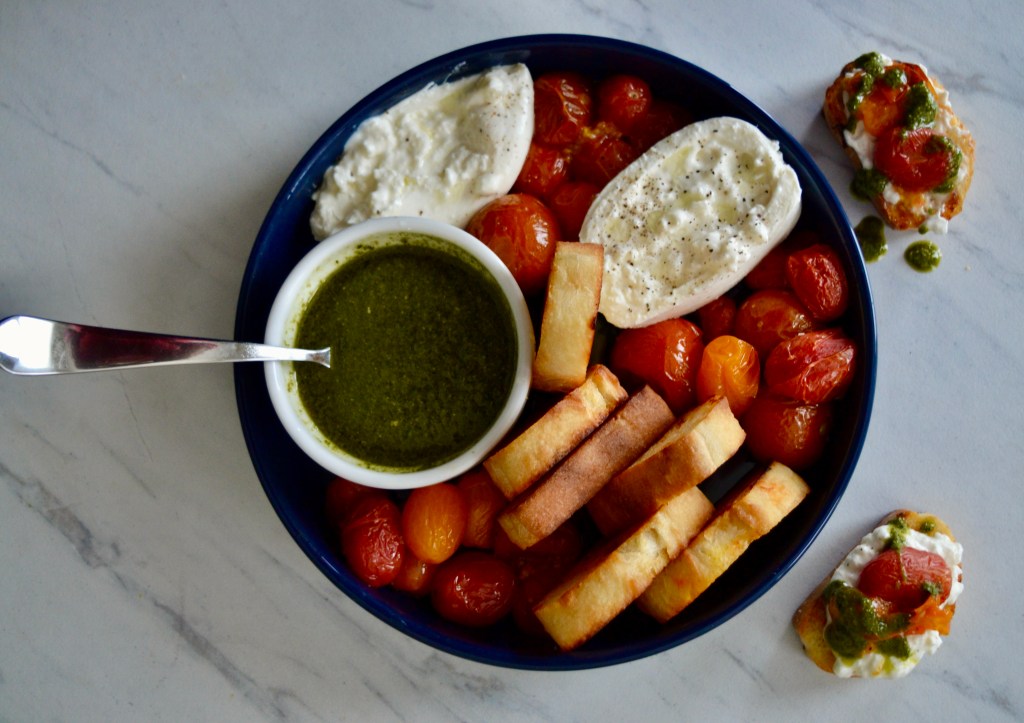
Caprese Bruschetta
Now that our social lives are getting back on track, we feel a little rusty in the dinner party/entertaining game. We find ourselves going back to the basics as we dust the rust off and have more people over for dinner. One of our simple hacks to make entertaining easy is to have an interactive…
-
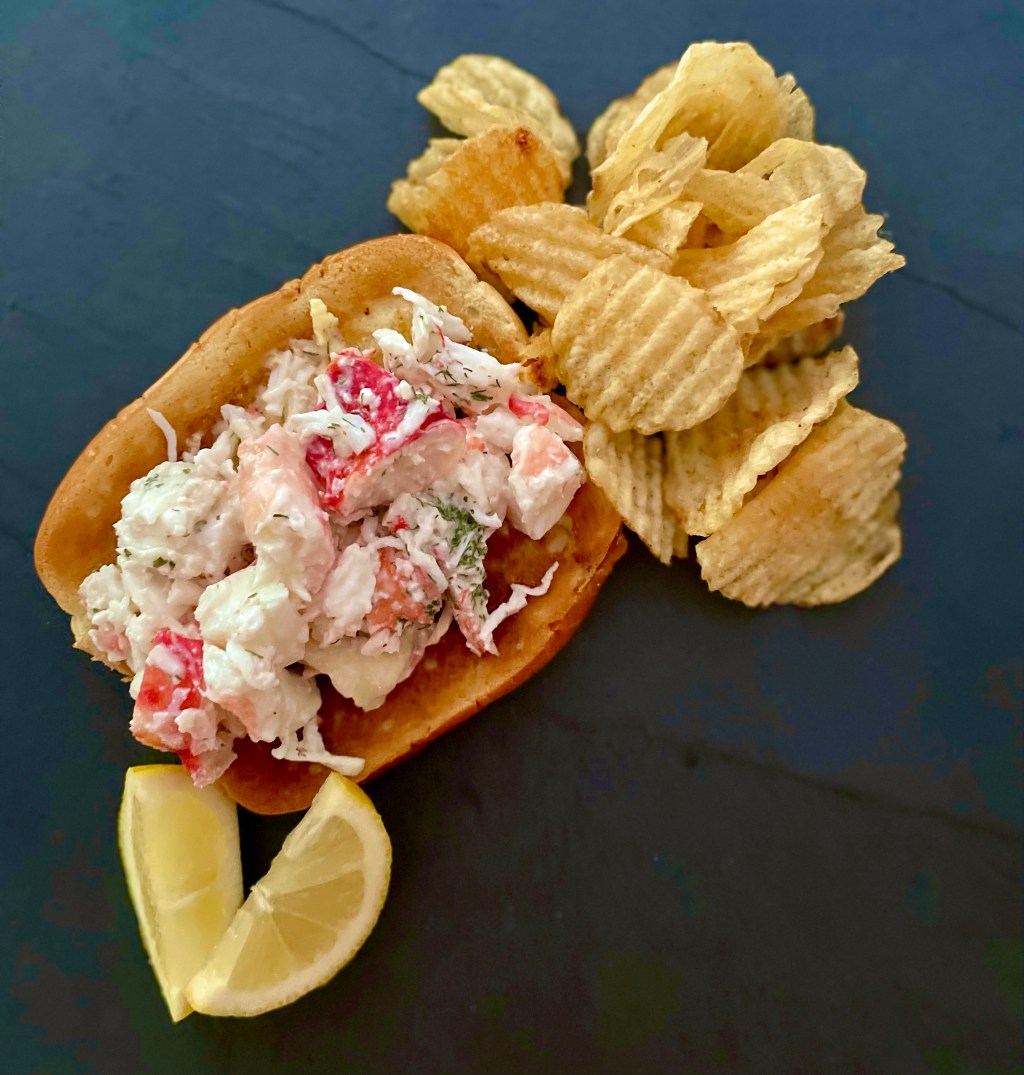
Alaskan King Crab Rolls
Every year for Calli’s birthday, we have a seafood birthday celebration with our best family friend, Leslie. We order a box of Alaskan king crab legs from Costco, steam the legs and serve them with lemon and hot butter. It is one of our favorite summer traditions and something we look forward to every year.…
-

The Columbus Coffee Experience
We have moved to a lot of new cities for baseball season over the past few years; probably 8 in the last 5 years alone. Moving to a new city is both exciting and a little overwhelming, so we try and get our boots on the ground and familiarize ourselves with the city and neighborhoods…
