Tag: eggs
-
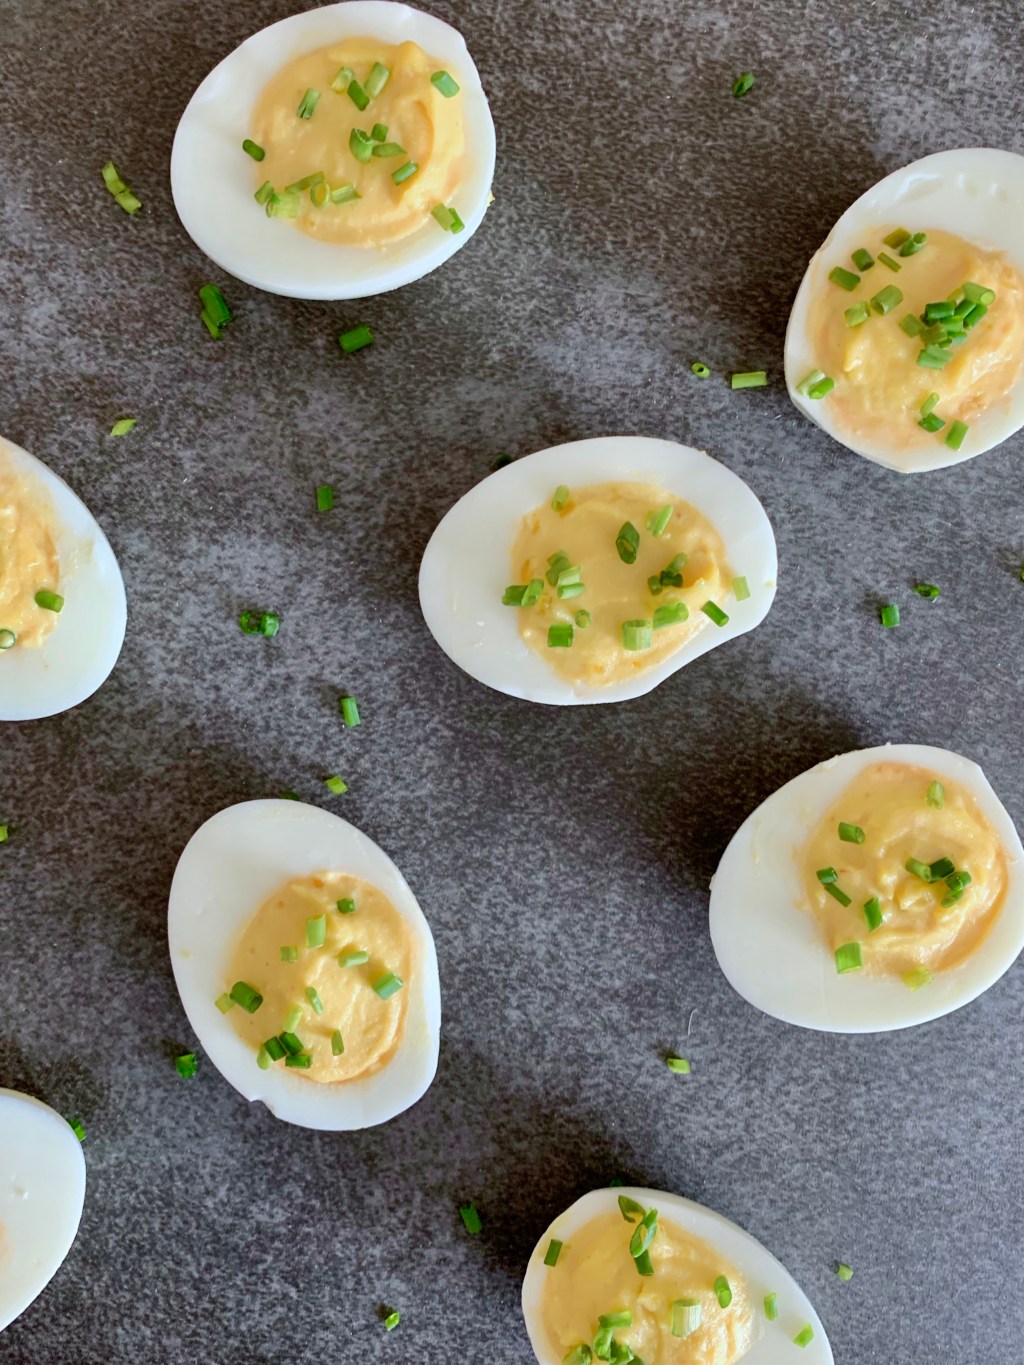
Classic Deviled Eggs
Whenever we think of creating an Easter menu, we always think of deviled eggs. We LOVE deviled eggs and rarely pass up an opportunity to make them or order them if we see them on a menu. We love all of the variations we see in recipes that really mix up the ingredients but to…
-
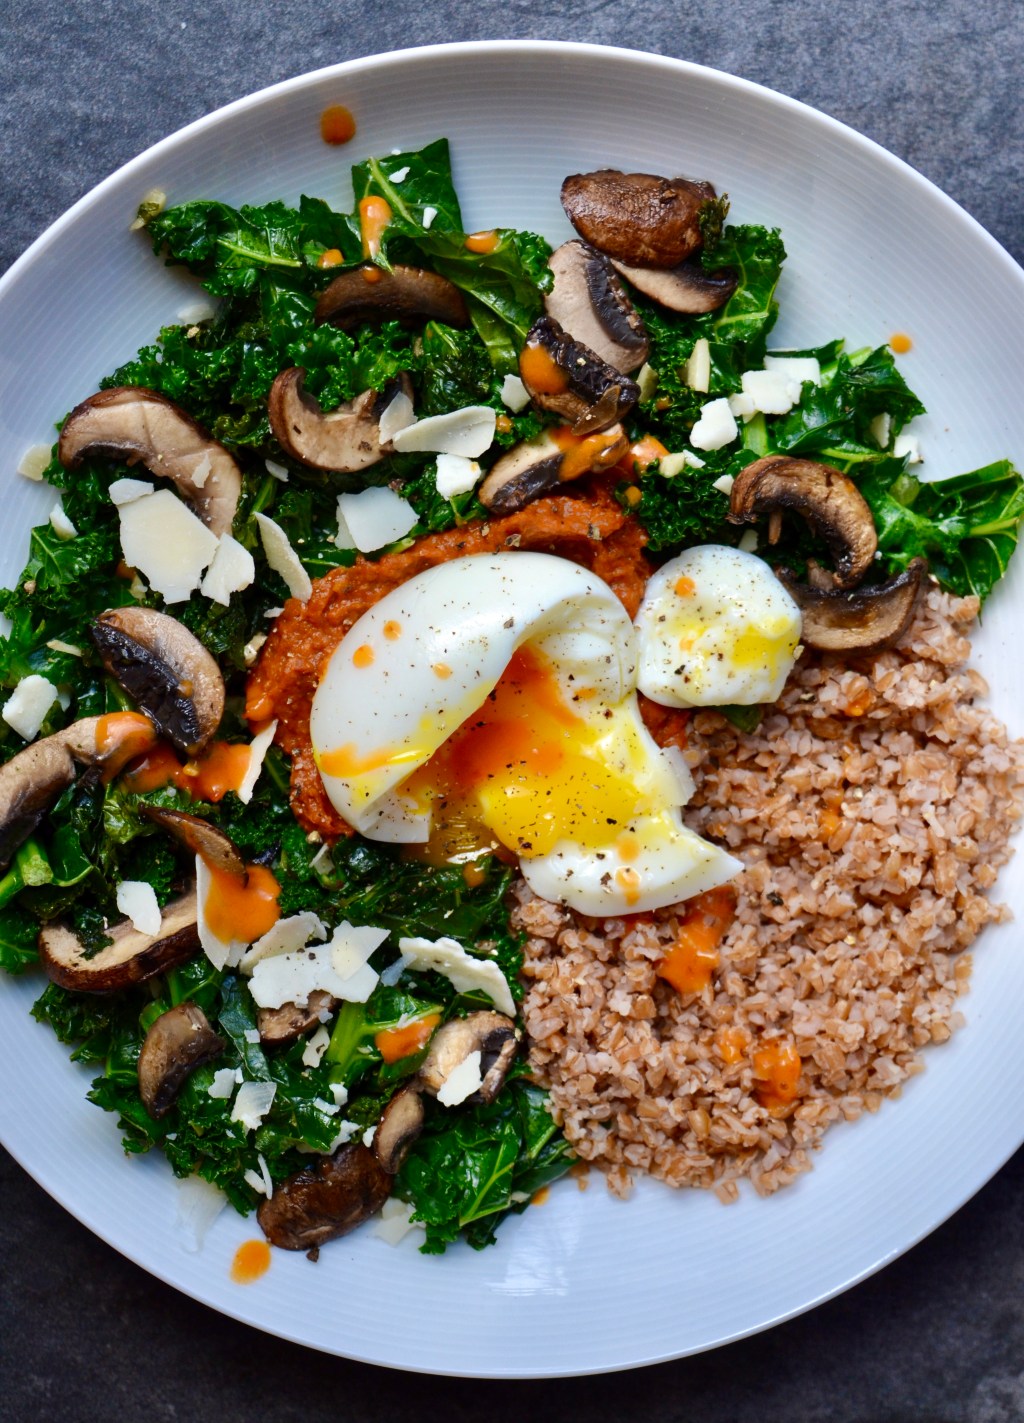
Breakfast For Dinner Bowls
“Breakfast For Dinner Bowls” used to be our fancy way of saying, holy crap we didn’t buy groceries and have absolutely no idea what’s for dinner. This is precisely what has happened on a number of occasions; so many, in fact, that Breakfast For Dinner Bowls have now become a request instead of an accident.…
-

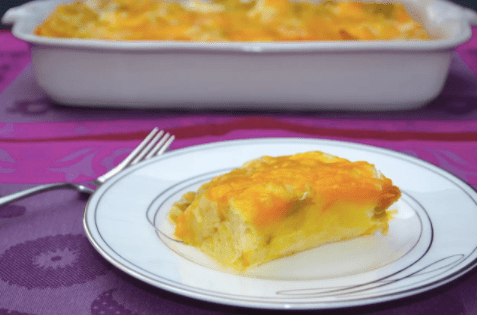
Cheesy Hash Brown Casserole
We had good friends over for brunch a few weekends ago and went to work brainstorming a delicious menu. It’s so easy to gravitate towards the same recipes over and over, so we wanted to break out of our shell and mix things up! For the main dish of our brunch menu, we chose to…
-
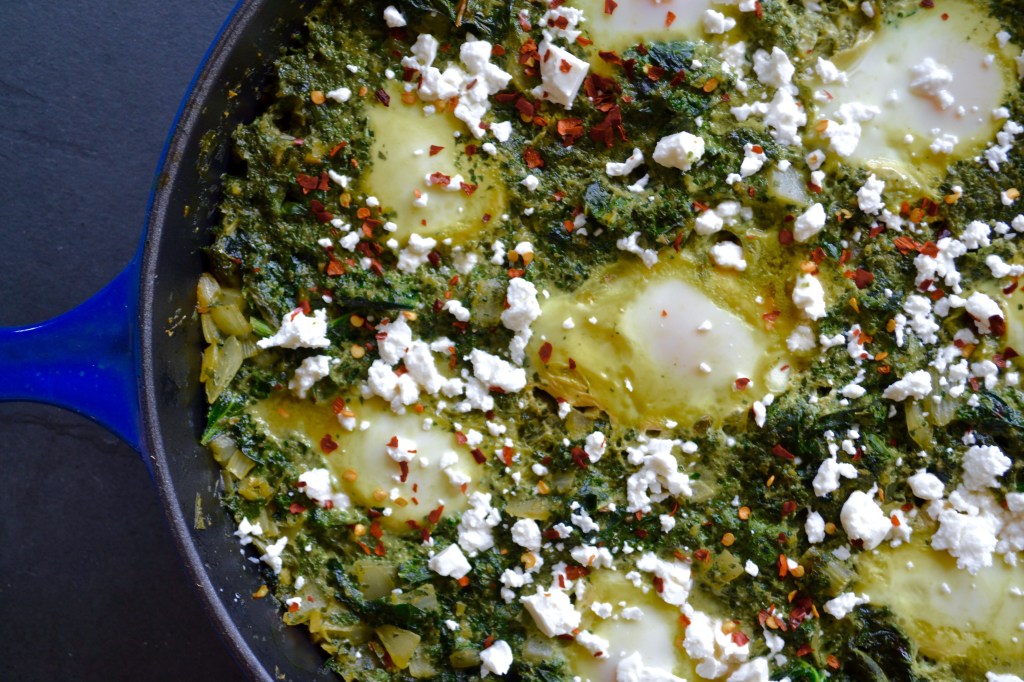
Green Shakshuka
Here at Tuck & Tate we love a good weekend brunch. Now that Tate has a human brother, brunch gatherings sometimes feel easier to pull off than dinners. When preparing a good brunch we always try to plan a menu of both sweet and savory dishes so that there is a little something for everyone.…
-

Nearly Eggless Quiche
This recipe dates back 2012 when we went to brunch at our cousin Deb’s house in Connecticut. While most of the world loves quiche, Tuck & Tate’s moms hate quiche, so we were a little panicked when we heard that quiche was on the menu. So much so that we made a pact to grab…
-

Farro and Zucchini Patties
We have been making variations of these farro and zucchini patties for a few years now. We keep coming back to them time and time again because of how versatile they are. The base recipe for the cakes is hearty and lends itself to nearly any flavor profile. Our favorite way to eat them is…
-

Vegetable Frittata
his recipe dates back to the first cooking job that Tuck’s mom had in culinary school. She was working for a chef that specialized in health foods and really developed her love of healthy cooking during that summer in Philly. One of the most fun parts of the job was Tuesday CSA deliveries. If you…
-
Green Chili Egg Bake
If you are like us this time of the year, you are entertaining more in a week than you have in the last three months. With family in town, every meal starts to feel like its own holiday! While we normally make this recipe for our Break the Fast dinner on Yom Kippur, we thought…
