Tag: Desserts
-

Browned Butter Rice Krispies
You may see this post and think “are they serious? More dessert on Halloween?!” Our short answer is YES! While the kids are out trick or treating, we like to have this easy and elevated dessert for the adults. It is wild how a simple step of browning the butter completely changes the taste of…
-

S’mores Blondies
We love making bite sized desserts for a party because they can be made in advance and don’t require any last minute effort in the kitchen. Particularly for the Super Bowl, where you typically don’t want to be cooking and tending to food in the kitchen throughout the game, it is nice to be able…
-
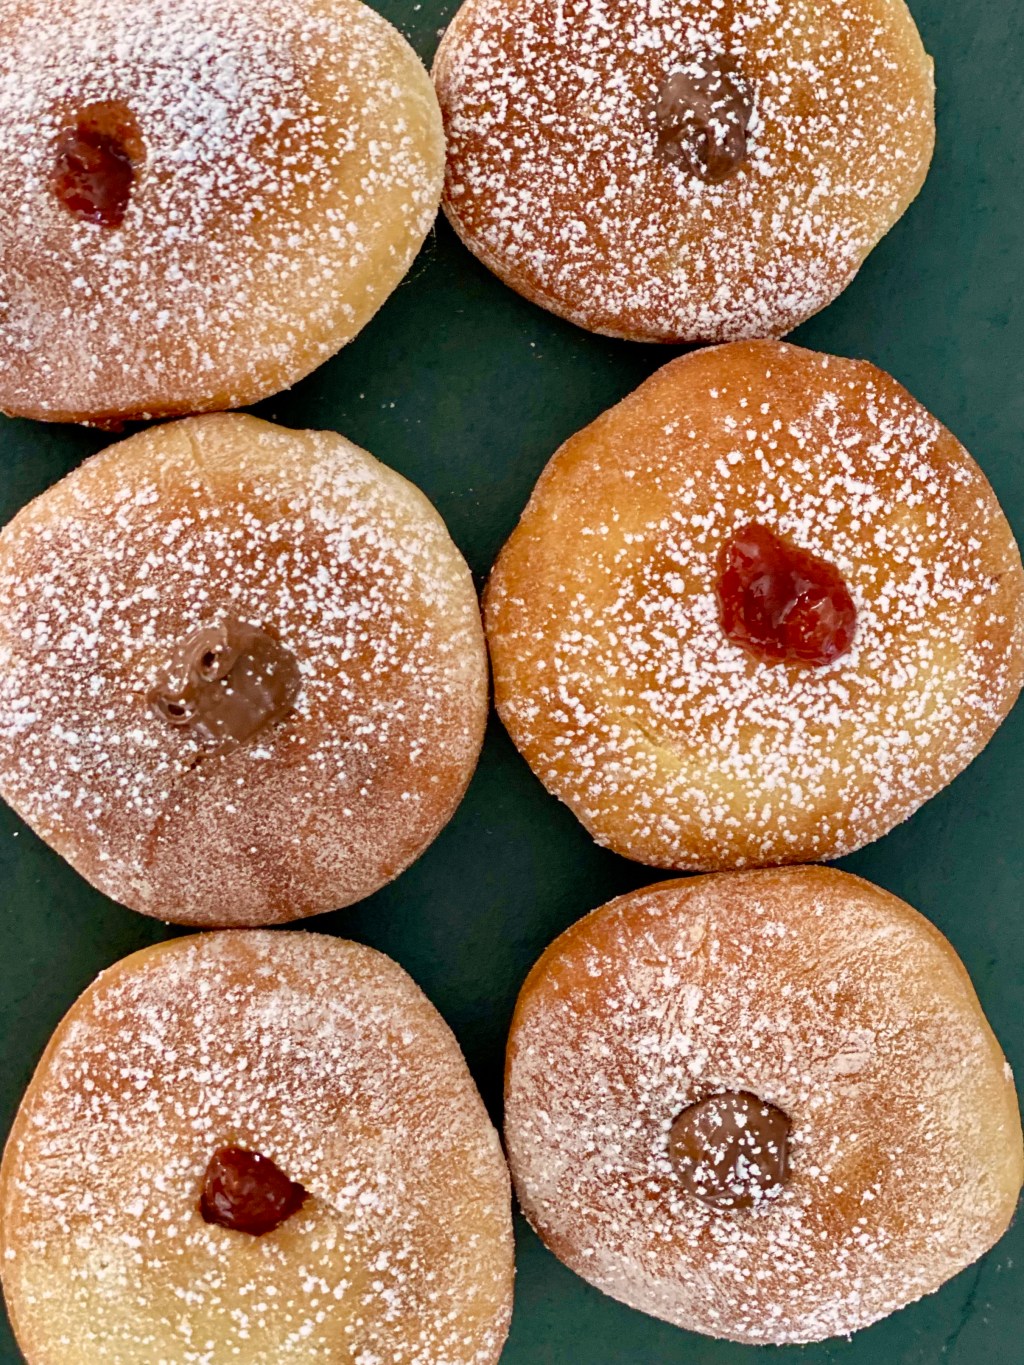
Nutella and Jelly Air Fried Sufganiyot
If you follow us on Instagram, you know that we love to treat ourselves to donuts! Sweet, crispy, fried dough – what is not to love? One of the most popular Hanukkah desserts is sufganiyot. For those unfamiliar, sufganiyot are Israeli donuts that are traditionally stuffed with jelly. We decided to recreate sufganiyot in our…
-

Summer Berry Trifle
After celebrating quite a few birthdays in May & June, we have had to start getting creative about what to do with leftover birthday cake. We love our share of cake, but after a few days, we were getting a little tired of tasting the same ingredients. We experimented a bit with different leftover birthday…
-

Strawberry Buttermilk Cake with Brown Sugar Glaze
We have been seeing versions of this cake online now for weeks, and finally Tuck’s mom caved and had to make it on a Saturday morning. We based our recipe off of King Arthur Flour’s recipe for Farmhouse Buttermilk Cake and tweaked it to add fresh strawberries and a little lemon zest to give it a brighter…
-

Apple Mascarpone Tart
Our dessert for our Golden Globes 2020 menu honors Christina Applegate, nominated for her role in Dead to Me. This was one of our favorite shows this summer and we were thrilled to make a dessert in her honor! Being that it is the first week of January, we tried to keep this dessert relatively…
-

Vanilla Bean Sugar Cookies
Is there anyone who doesn’t like cookies over the holiday season? We don’t think so. We love these cookies because they can add to your holiday festivities in so many ways. If you want to have a holiday baking day like Tuck’s grandma and aunt in California, you can bake the cookies in advance and…
-
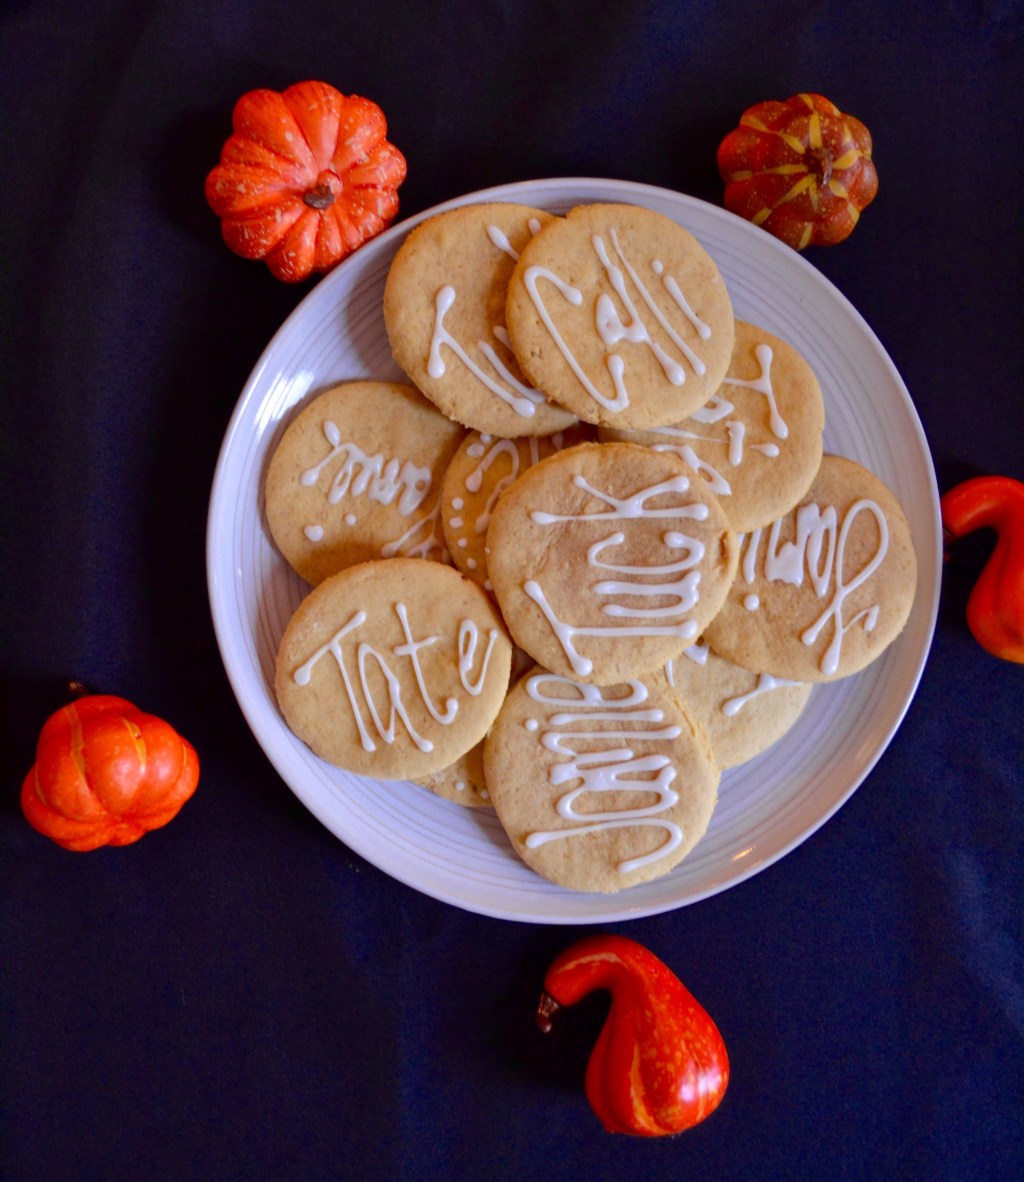
Pumpkin Sugar Cookie Place Cards
At Tuck & Tate, we think you are never too old for a party favor. It is that little extra that leaves a great impression with guests long after the party is over. Since we always have place cards at Thanksgiving, we thought we would make cookies decorated with everyone’s names as the place card.…
