Tag: cheese
-

Pumpkin Mac & Cheese
One of our favorite childhood memories of Halloween is having a special dinner of mac and cheese and “octopus” hot dogs. We would slam down that dinner and run out the door to start trick or treating. In honor of that tradition, we created this recipe for pumpkin mac and cheese. It is an adult…
-

Arugula & Burrata Flatbread
This flatbread is one of our go-to recipes for summer entertaining or a quick weeknight dinner. With just a few simple ingredients, this recipe bursts with flavor from the creamy burrata, citrusy lemon oil, and fresh basil. We top it with lots of peppery arugula (more than pictured) so that we have a salad and…
-
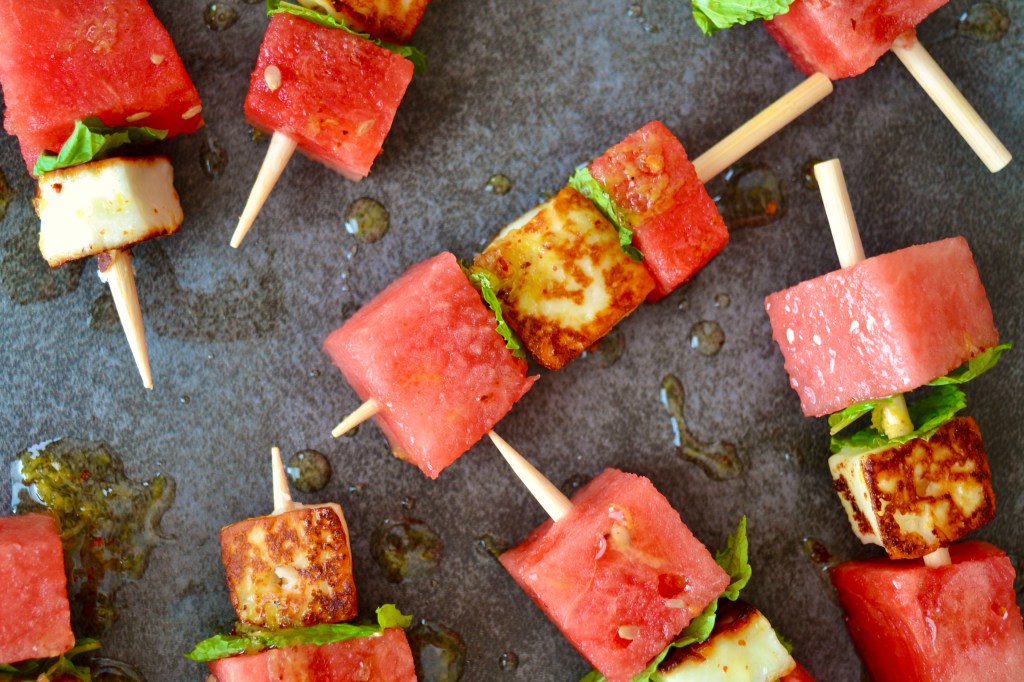
Watermelon & Halloumi Kabobs
We are approaching Memorial Day Weekend, which means that it is officially #WatermelonSeason. We love watermelon in the summer, and are particularly into mixing the sweet fruit with savory toppings for something unexpected. To prepare for this weekend’s barbecue festivities, we are making loads of these kabobs with watermelon, mint, and halloumi cheese. Halloumi is…
-

Spicy Chorizo Queso
Last week Justin Timberlake said “it’s gonna be May” and just like that, here we are rolling into Cinco de Mayo. Last year’s cinco celebrations were a bit bleak thanks to Covid quarantine and a general dismal state of mind. We are feeling much more festive this year and ready for any type of party…
-

Beer & Cheese Bread
While this Beer & Cheese Bread was originally inspired by St. Patrick’s Day celebrations, it is such a versatile bread that it pairs well with just about everything from chili to barbecue. What we love most about this recipe is how well the contrasting flavors in the bread work together. The beer adds a natural fizz…
-

Valentine’s Day Cheese Board For Two
When coming up with our 2021 Valentine’s Day Menu, we admit , we were feeling a bit indulgent. We know that most couples will be spending Valentine’s Day in their own homes this year, so we wanted a meal that felt decadent and different than just an average weeknight dinner. We are starting our menu…
-
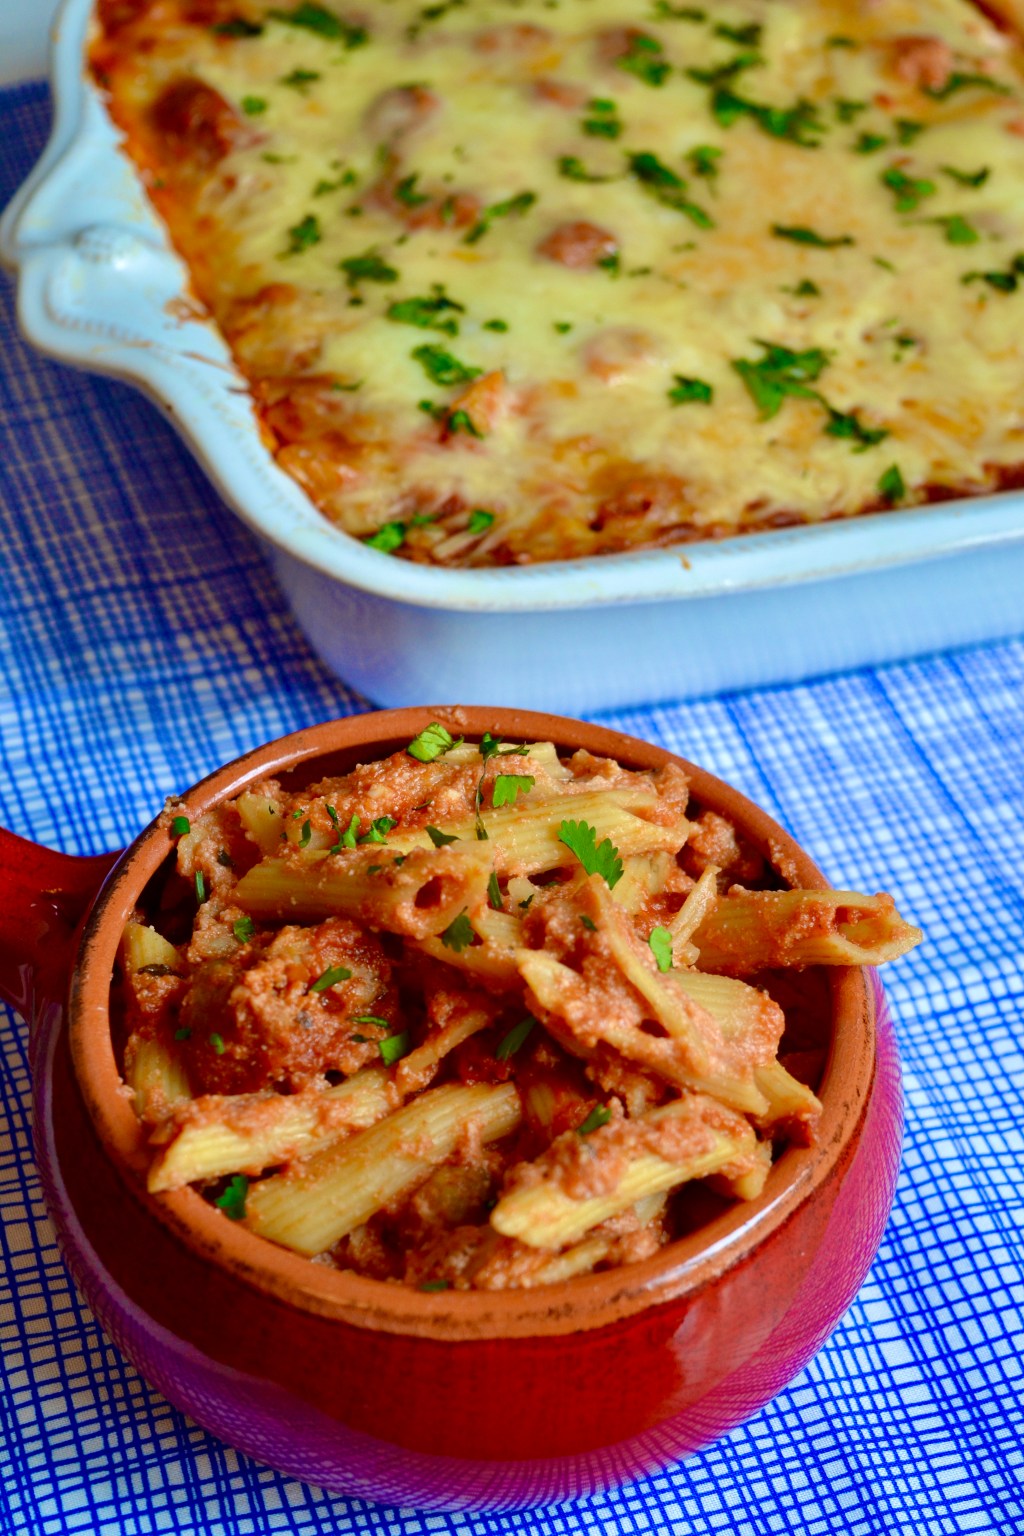
Cheesy Baked Penne
We love a good comfort food recipe and are particularly fond of this cheesy baked penne. We recently had a friend who was ill, and to lend a helping hand, we prepared this recipe to send to his house. In the days of social distancing, dinner on the doorstep is an easy gesture for someone…
-
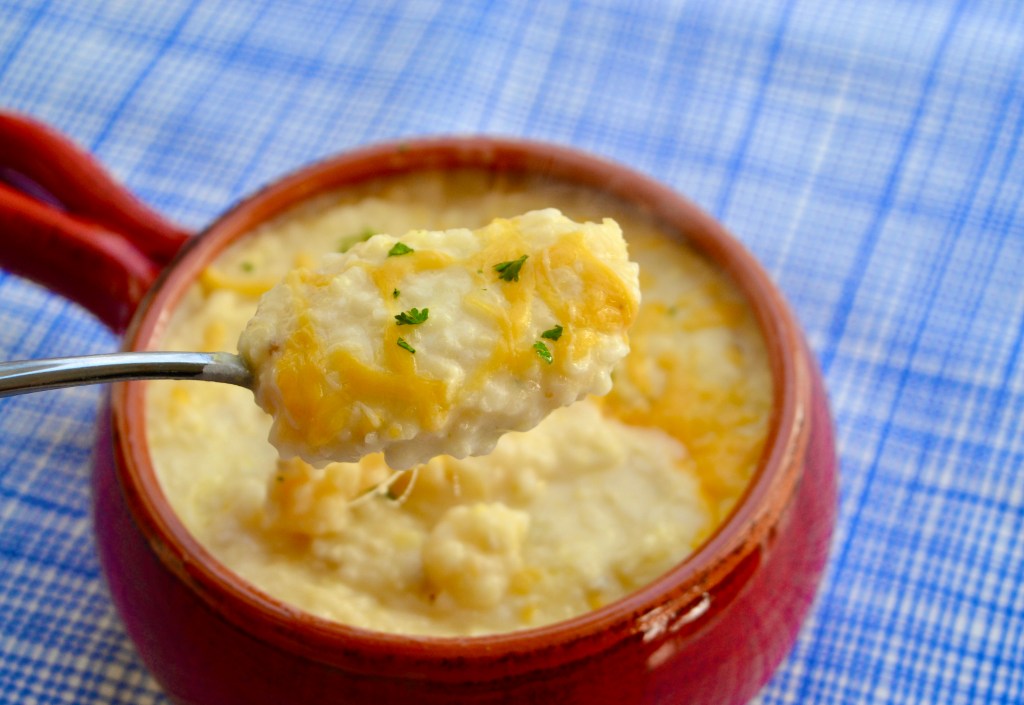
Cheesy Stone Ground Grits
Does anyone else love the grits from Waffle House as much as we do? How could you not! Based on the amount of road trips we have taken in our lifetime, we know that there is just something so satisfying about grits at a pit stop on an early morning drive. When the weather is…
-

Cheesy Hash Brown Casserole
We had good friends over for brunch a few weekends ago and went to work brainstorming a delicious menu. It’s so easy to gravitate towards the same recipes over and over, so we wanted to break out of our shell and mix things up! For the main dish of our brunch menu, we chose to…
-

Mac & Brie
We only started having mac and cheese on Thanksgiving a few years ago, when our dad was inspired by a Cajun macaroni recipe he saw online and insisted on bringing it for dinner. After its introduction on our Thanksgiving plates, we couldn’t imagine another Thanksgiving without one of our all time favorite side dishes. We…
