Category: Baked Goods
-
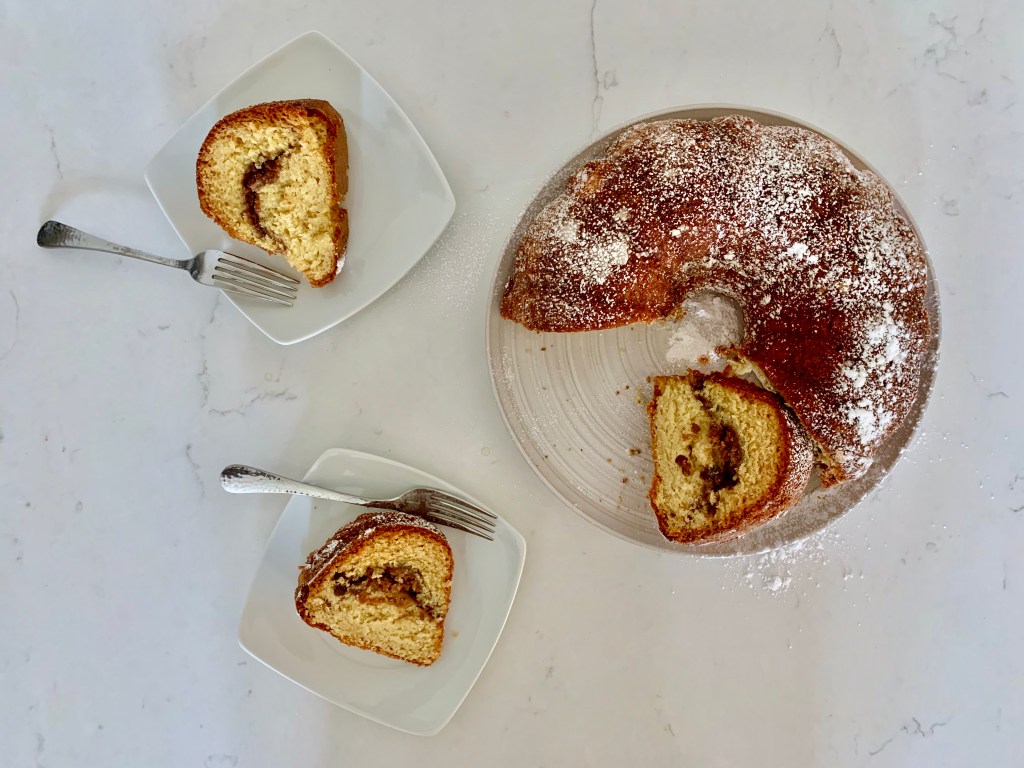
Cinnamon Swirl Coffee Cake
This recipe dates back to 2011 when Jamie was working in Portland, Maine. One of the signature dishes at the bakery she working at was a Cinnamon Swirl Coffee Cake, and it was so popular that she was baking it 4-5 days per week. The second this baby comes out of your oven, you will…
-
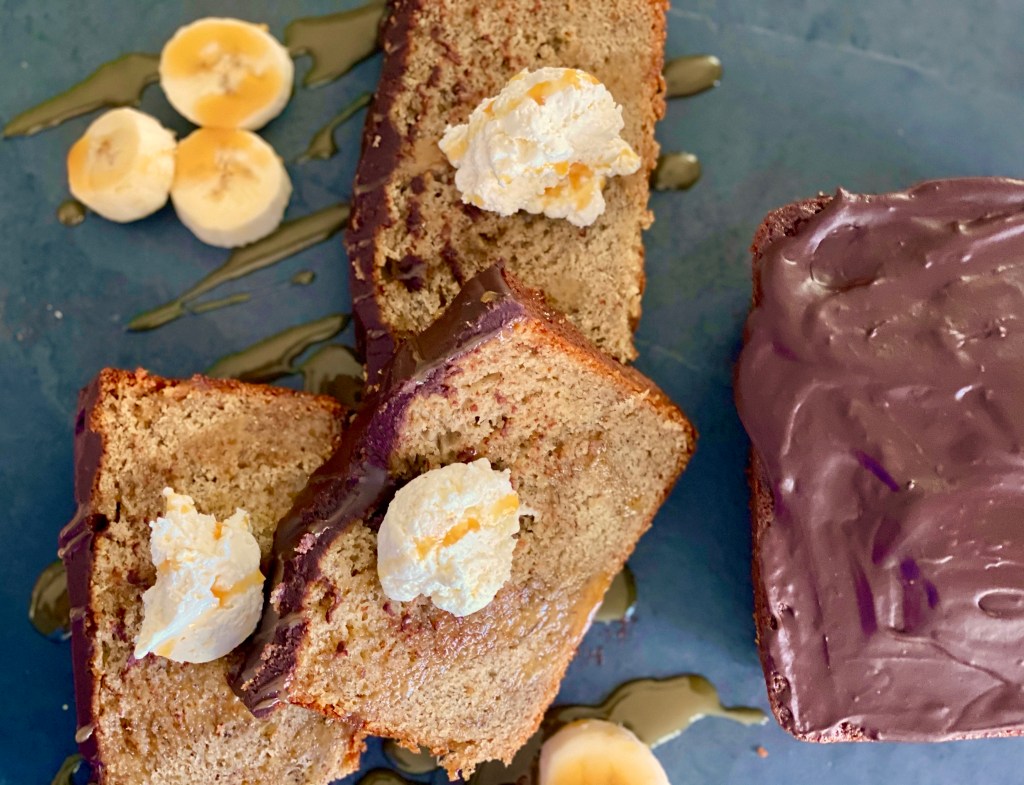
Rick The Baker’s Banana Bread
We were lucky to grow up in a household that both celebrated and encouraged cooking. Our mom cooked dinner almost every night and on Wednesday’s it was our dad’s turn to cook. Over time, our dad’s repertoire in the kitchen expanded to baking (woohoo!) and he is now baking something almost every week. If you…
-
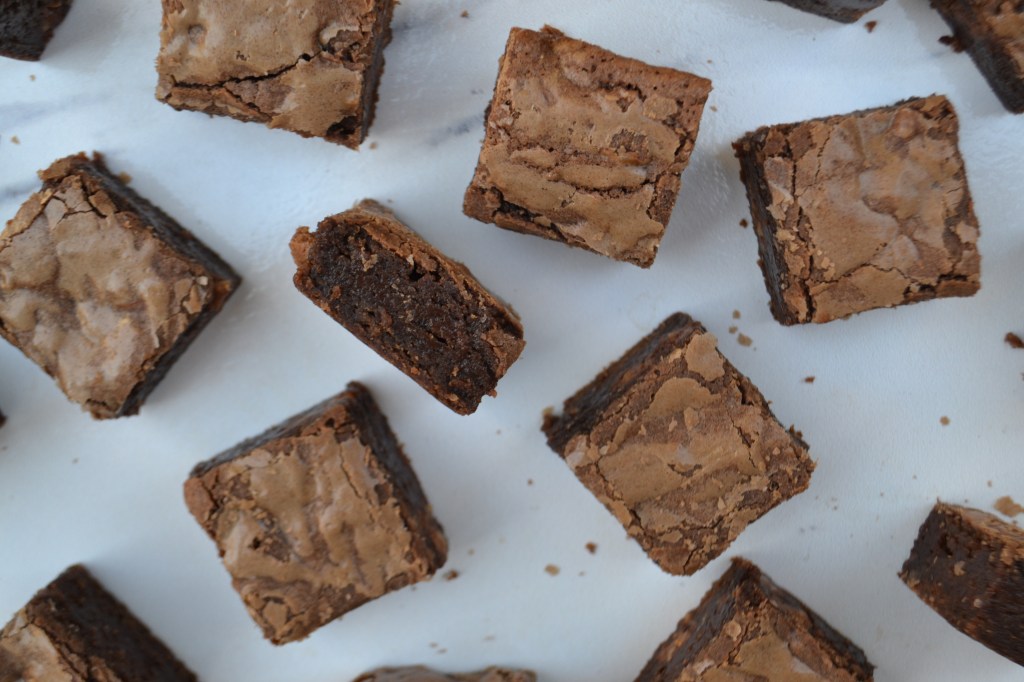
Heath Bar Brownies
Everyone needs a good brownie recipe to have in their back pocket, and this is the one we have in ours. These brownies are fudgy, chocolatey, and contain that little bit of surprise when you bite into a piece of caramel Heath Bar. We love this recipe because it comes together really quickly- even with…
-

Apple Pie Bars
We love apple desserts in the fall and are always seeking out variations of the traditional apple pie. Pies are great for holidays and have more of a show stopping presentation, but if we are craving a little weekday treat we don’t need to put in all that time decorating and rolling dough. We found…
-

Blueberry Coffee Cake Muffins
When Tuck’s mom graduated from culinary school, she took her first cooking job at a bakery in Portland, Maine. The bakery was known for a number of great dishes, but one of the standouts was coffee cake. Tuck’s dad gained approximately 15 lbs that baseball season eating said coffee cake because it really was that…
-

Vanilla Bean Sugar Cookies
Is there anyone who doesn’t like cookies over the holiday season? We don’t think so. We love these cookies because they can add to your holiday festivities in so many ways. If you want to have a holiday baking day like Tuck’s grandma and aunt in California, you can bake the cookies in advance and…
-
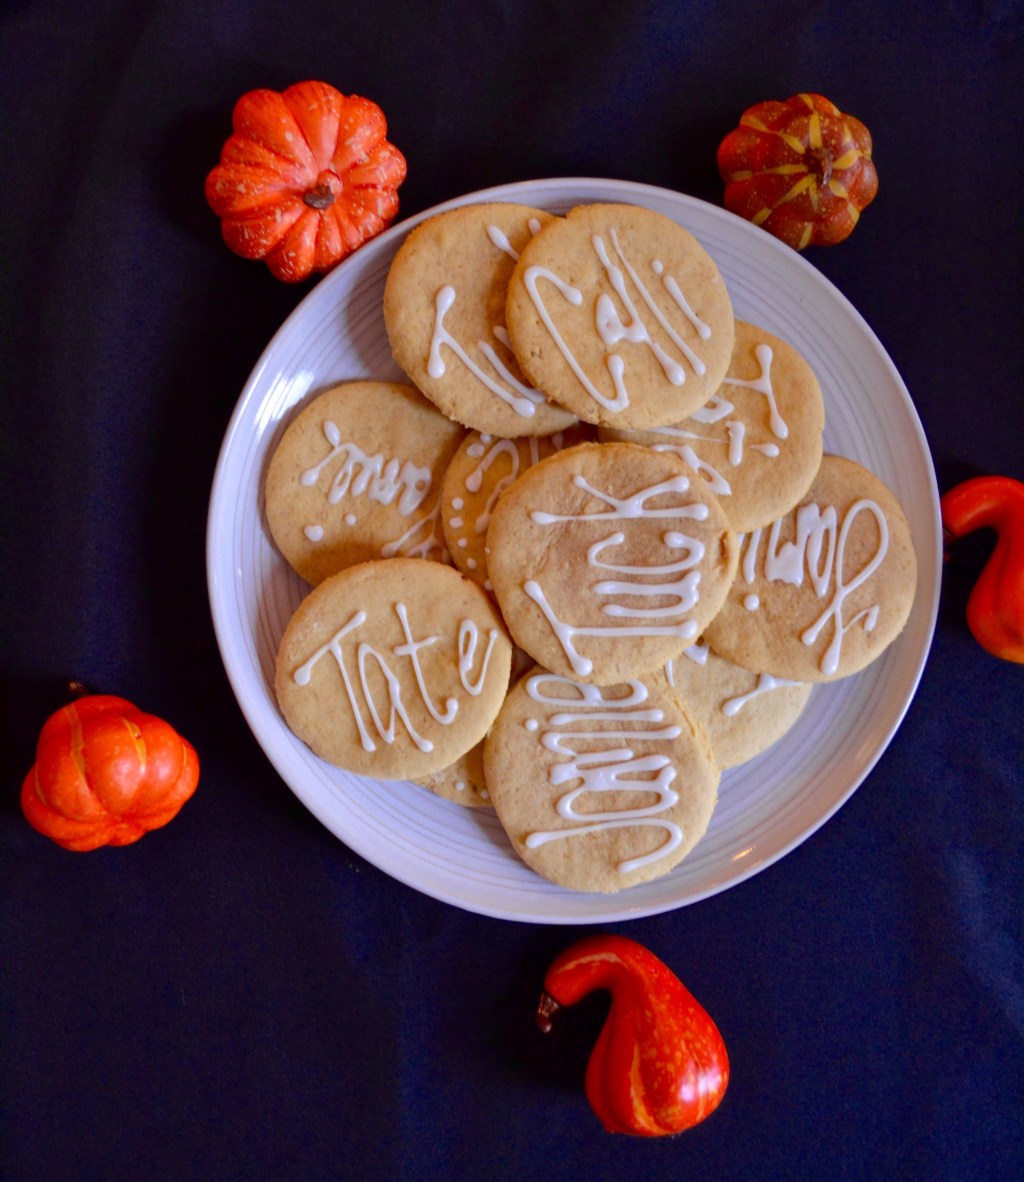
Pumpkin Sugar Cookie Place Cards
At Tuck & Tate, we think you are never too old for a party favor. It is that little extra that leaves a great impression with guests long after the party is over. Since we always have place cards at Thanksgiving, we thought we would make cookies decorated with everyone’s names as the place card.…
